
There’s something magical about vintage-inspired cakes that evoke a sense of nostalgia and timeless elegance. Whether it’s the delicate floral patterns, soft pastel hues, or intricate lace-like details, these cakes bring charm and sophistication to any celebration. Among the many vintage cake designs, the heart-shaped cake stands out as a symbol of love and joy, making it a perfect centerpiece for weddings, anniversaries, Valentine’s Day, or even heartfelt birthday celebrations.
If you’ve ever admired the beauty of a vintage heart cake but thought it was too challenging to recreate, this guide is here to help! In this blog post, we’ll take you step by step through the process of designing a beautiful vintage heart cake that’s as delightful to make as it is to behold. From gathering the right tools and ingredients to mastering buttercream swirls and floral accents, you’ll discover how to craft a cake that will wow your guests and leave them asking for seconds.
So roll up your sleeves, grab your piping bags, and let’s dive into the world of vintage cake artistry. Whether you’re a seasoned baker or a beginner, this tutorial will help you turn a simple heart-shaped cake into a masterpiece for any celebration.
Tools and Ingredients You’ll Need for a Vintage Heart Cake
Creating a beautiful vintage heart cake begins with the right tools and ingredients. Here’s a detailed list to ensure you’re well-prepared for this delightful baking project:
Essential Baking Tools
- Heart-Shaped Cake Mold: The star of the show! A sturdy, non-stick mold ensures your cake holds its shape perfectly.
- Mixing Bowls and Whisks: For mixing your batter and frosting smoothly.
- Spatulas and Palette Knife: For spreading frosting evenly and achieving sharp edges.
- Piping Bags and Tips: Use various tips like star, round, and leaf to create intricate vintage designs.
- Measuring Cups and Spoons: Accurate measurements are key to baking success.
Ingredients for the Cake
- Basic Cake Ingredients:
- Flour: All-purpose or cake flour for a tender texture.
- Sugar: Granulated or caster sugar for sweetness.
- Butter: Unsalted butter for a rich flavor.
- Eggs: For structure and moisture.
- Milk or Buttermilk: Adds moisture and enhances the cake’s flavor.
- Flavoring Options:
- Vanilla extract for a classic taste.
- Almond or rose essence for a subtle vintage vibe.
- Leavening Agents: Baking powder or baking soda to ensure a fluffy cake.
Decorating Essentials
- Buttercream Frosting: Whipped to perfection for smooth finishes and piped details.
- Fondant: Ideal for creating edible lace patterns or covering the cake for a polished look.
- Edible Pearls and Sprinkles: Add a touch of elegance and shimmer.
- Pastel Food Coloring: Soft shades like blush pink, baby blue, and mint green create a vintage aesthetic.
Optional Add-Ons for a Vintage Flair
- Edible Flowers: Roses, pansies, or violets for a romantic touch.
- Metallic Edible Paint: Gold or silver accents for added sophistication.
- Lace Stencils or Embossing Tools: Perfect for creating intricate designs on fondant or buttercream.
With these tools and ingredients, you’ll have everything you need to bring your vintage heart cake vision to life. Up next, we’ll dive into how to prepare the perfect cake base, setting the stage for all the stunning decorations to come!
Preparing Your Cake Base Like a Pro
Achieving a perfect vintage heart cake starts with a flawless cake base. This section will guide you through every step to ensure your cake is delicious, sturdy, and ready for decorating.
Step-by-Step Baking Guide
Start by preheating your oven to the temperature specified in your recipe. Grease and flour your heart-shaped cake mold to prevent sticking. Mix the cake batter, ensuring it’s smooth and lump-free. Pour the batter into the mold, filling it about three-quarters full to allow for rising. Bake according to the recipe, checking for doneness with a toothpick or cake tester.
Tips for a Perfect Heart Shape
Use a heart-shaped mold for consistent results, but if you don’t have one, you can carve the shape from a round or square cake. Chill the cake before cutting to prevent crumbling. Trim the edges carefully to refine the heart shape and make it symmetrical.
Choosing the Right Filling
Pick a filling that complements your cake flavor, such as buttercream, fruit preserves, or chocolate ganache. Spread an even layer between the cake layers to provide a stable structure and prevent sliding. For a vintage touch, consider a raspberry jam or lemon curd filling.
Cooling and Crumb Coating
Allow the cake to cool completely before frosting to avoid melting the buttercream. Apply a thin crumb coat, which is a base layer of frosting, to seal in crumbs and create a smooth surface for decorating. Chill the crumb-coated cake for about 30 minutes before moving on to the final decoration.
By following these steps, you’ll have a sturdy and well-prepared cake base that’s ready for vintage-inspired decorations. Let’s move on to the fun part—decorating your heart cake with a timeless, elegant touch!
Decorating Your Heart Cake with a Vintage Touch
Now that your heart-shaped cake is baked, filled, and crumb-coated, it’s time to bring it to life with vintage-inspired decorations. This is where creativity shines, and your cake transforms into a masterpiece.
Buttercream Basics
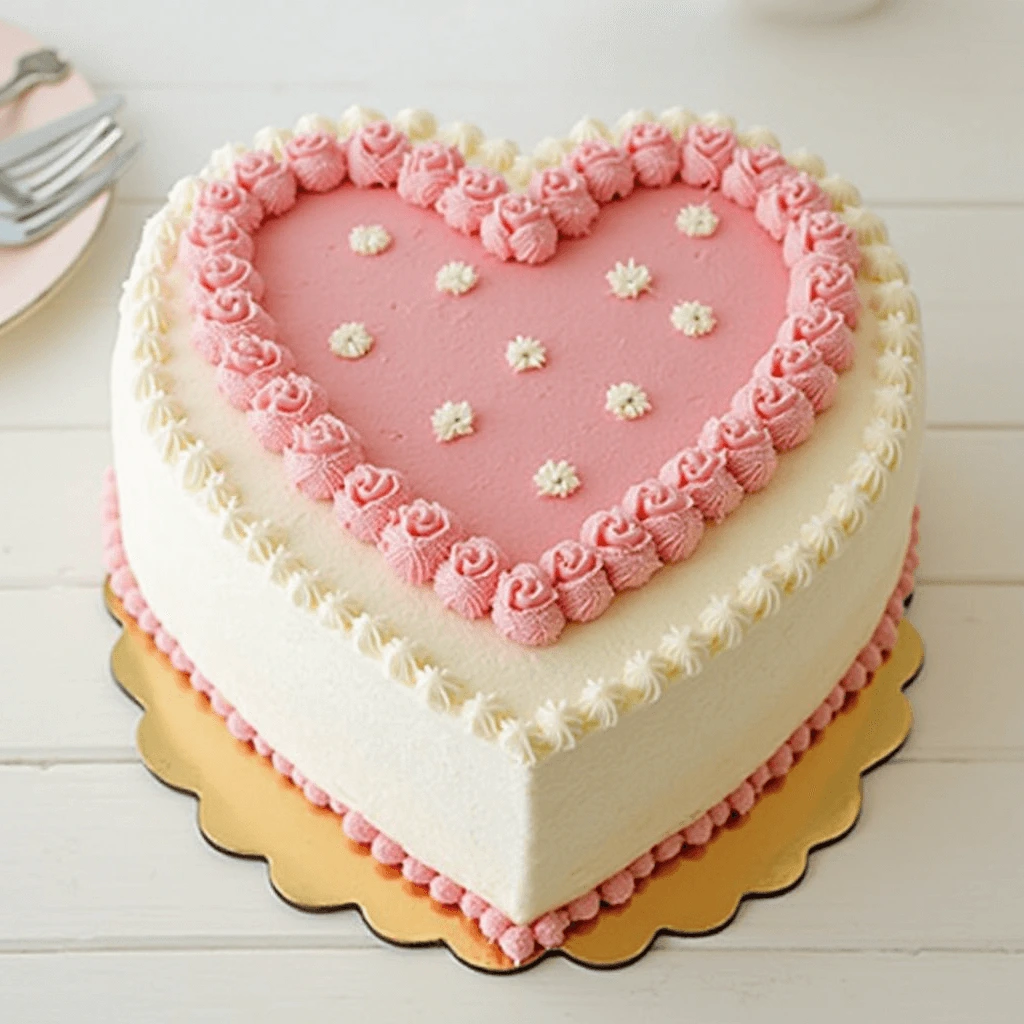
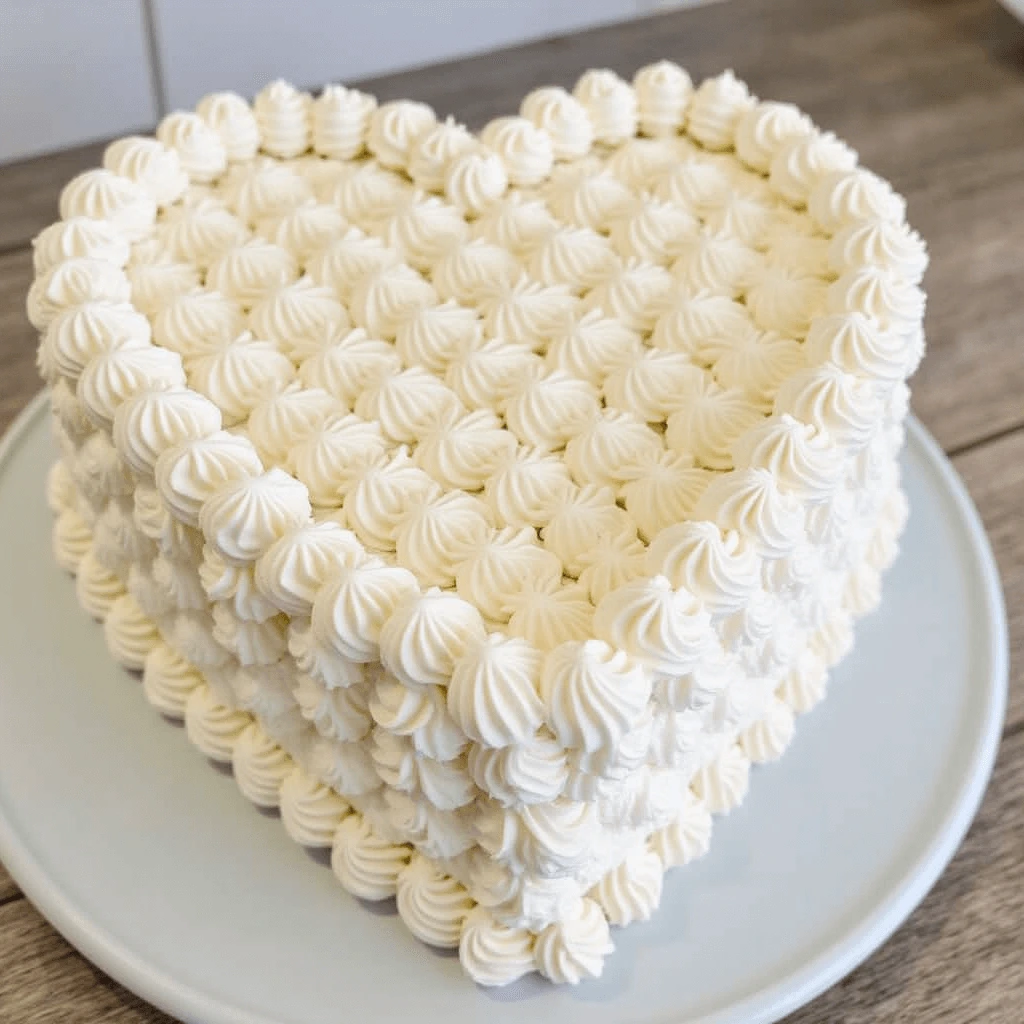
Start by applying a smooth layer of buttercream frosting in your chosen pastel color. Use a palette knife or a bench scraper for a flawless finish. To add texture, use a piping bag with a star or round tip to create swirls, rosettes, or bead borders. These classic buttercream techniques are perfect for a vintage look.
Adding Fondant and Edible Lace
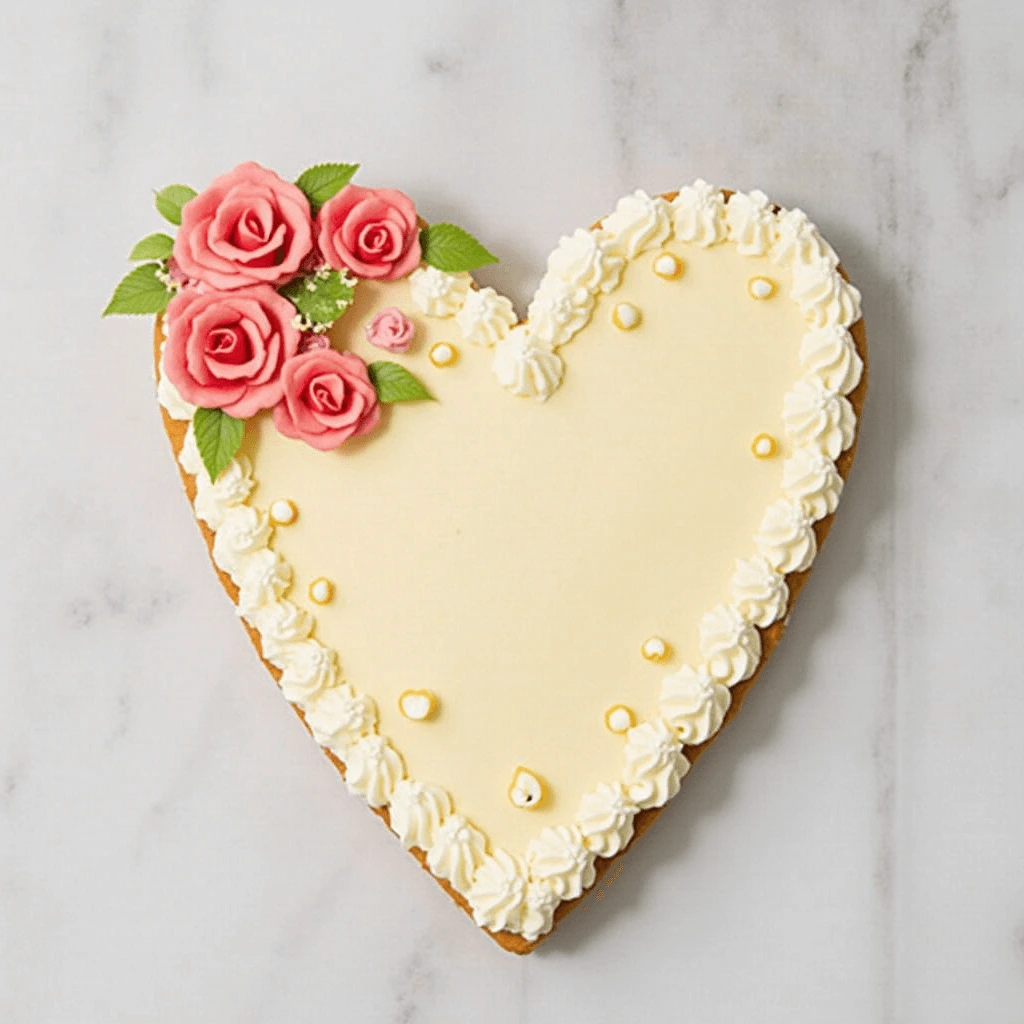
Roll out fondant to cover the cake or create decorative accents like bows, ruffles, or hearts. Use lace stencils or embossing tools to imprint intricate patterns onto the fondant. For an authentic vintage touch, paint over the embossed designs with metallic edible paint in gold or silver.
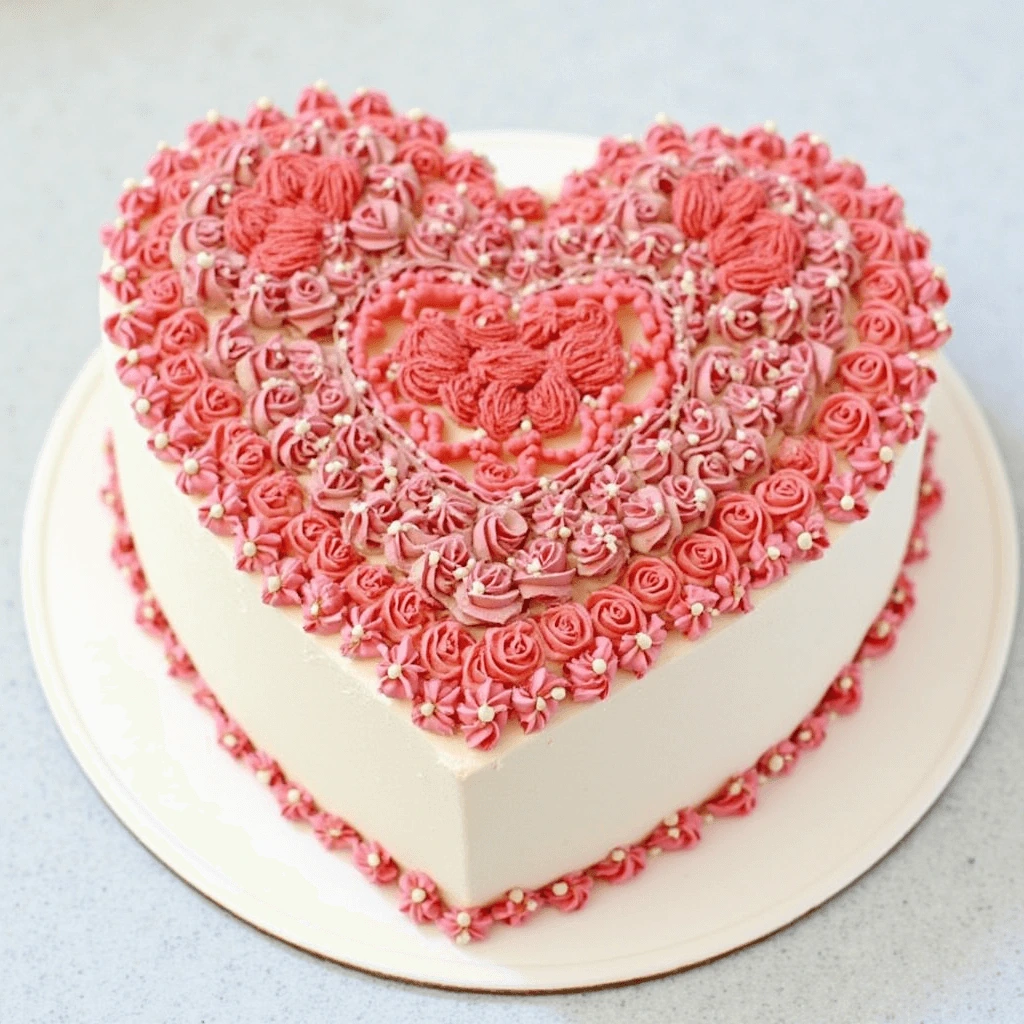
Incorporating Floral and Pearl Designs
Decorate the cake with piped flowers using a petal or leaf tip, or add edible flowers like roses and violets for a romantic flair. Place edible pearls along borders or within designs to mimic vintage jewelry. Arrange flowers and pearls symmetrically to enhance the cake’s elegance.
Color Palette and Final Details
Choose soft pastel shades such as blush pink, lavender, or mint green for a classic vintage aesthetic. Blend multiple colors in your piping bag for a gradient effect on rosettes and borders. Add finishing touches like a dusting of edible glitter or hand-painted details to elevate your design.
With these techniques, your heart cake will exude vintage charm and become the centerpiece of any celebration. Up next, let’s explore creative ways to use your vintage heart cake for various occasions!
Ideas for Using Your Vintage Heart Cake
A beautifully decorated vintage heart cake isn’t just a dessert—it’s a statement piece that can make any celebration unforgettable. Here are some creative ways to use your heart-shaped cake for different occasions.
Perfect for Special Occasions
Weddings: Use the vintage heart cake as a romantic centerpiece for an intimate wedding or as part of a dessert table.
Anniversaries: Celebrate love and milestones with a cake that symbolizes affection and cherished memories.
Valentine’s Day: Nothing says “I love you” like a heart-shaped cake adorned with delicate vintage details.
Customizing for Themes
Birthday Celebrations: Personalize the cake with the birthday person’s favorite colors and decorations, keeping the vintage flair intact.
Seasonal Parties: Incorporate seasonal elements, such as pastel flowers for spring or icy blue accents for winter festivities.
Baby Showers or Gender Reveals: Use soft pastel colors and elegant designs to create a charming cake for the occasion.
Creating Mini Heart Cakes
Individual Servings: Bake smaller heart cakes for single servings, perfect for weddings, parties, or gifting.
Dessert Table Feature: Arrange mini heart cakes with varying designs to create an eye-catching vintage display.
DIY Decorating Stations: Host a fun activity where guests decorate their own mini heart cakes with vintage-inspired elements.
Your vintage heart cake is versatile and can be adapted to suit any celebration. Whether you’re going big with a show-stopping centerpiece or charming with mini versions, it’s sure to leave a lasting impression on everyone who sees and tastes it!
Tips and Tricks for Success
Creating a stunning vintage heart cake is a rewarding experience, but a little extra know-how can make the process even smoother. Here are some tips and tricks to help ensure your cake turns out perfectly.
Common Mistakes to Avoid
Uneven Layers: Use a serrated knife or cake leveler to trim your layers for a flat, even surface.
Frosting Mishaps: Chill your cake before applying buttercream to prevent it from sliding or melting.
Melting Fondant: Avoid overhandling fondant and work on a cool surface to keep it pliable but firm.
Make-Ahead Tips
Bake in Advance: Prepare your cake layers a day or two ahead and store them tightly wrapped in plastic wrap at room temperature or in the freezer.
Pre-Make Decorations: Create fondant accents, edible lace, or piped flowers in advance to save time on the day of assembly.
Batch Your Work: Mix and color your buttercream ahead of time, storing it in airtight containers until ready to use.
Storage and Serving
Keep It Fresh: Store your decorated cake in a cool, dry place or in the refrigerator, depending on the ingredients used. Bring it to room temperature before serving for the best flavor and texture.
Transport with Care: Place the cake in a sturdy box and keep it level during transport to avoid smudging the decorations.
Serve with Style: Use a vintage-style cake stand or platter to showcase your creation and enhance its visual appeal.
By following these tips and tricks, you’ll avoid common pitfalls and streamline the cake-making process. Plus, you’ll have a dessert that looks as incredible as it tastes!
Conclusion
Creating a beautiful vintage heart cake is a rewarding and creative process that brings elegance and charm to any celebration. Whether you’re celebrating love, friendship, or a special milestone, this cake will surely capture hearts with its timeless beauty and delicious taste. From preparing the perfect cake base to decorating it with intricate buttercream designs, fondant accents, and delicate florals, every step offers an opportunity to express your creativity and bring a touch of vintage nostalgia to your event.
Remember, the key to a stunning vintage heart cake is patience, attention to detail, and most importantly, the love you pour into every step of the process. Don’t be afraid to experiment with colors, textures, and techniques to make your cake uniquely yours. Whether you’re a seasoned baker or a beginner, this project is a chance to create something truly special.
We hope this guide has inspired you to try your hand at creating a vintage heart cake for your next celebration. We’d love to hear about your cake-making journey—share your thoughts, tips, or photos in the comments below, and let us know how your beautiful creation turned out! 💖🎂✨